How to Clean and Store Your Razor
Post Disclaimer
*We may earn a commission for purchases made using our links. Please see our disclosure to learn more.
The bathroom mirror reflects back a familiar scene: a razor sitting in a puddle of water on the sink’s edge, droplets clinging to the blades, rust beginning its slow creep along the cartridge. It’s a sight many overlook until the consequences become impossible to ignore—skin irritation, razor burn, or infections that transform a simple grooming routine into a painful ordeal.
Proper razor care isn’t just about making blades last longer, though that’s certainly a welcome benefit. It’s about protecting the skin, preventing bacterial infections, and maintaining a hygienic grooming routine that supports overall wellbeing. The difference between a well-maintained razor and a neglected one can mean the difference between smooth, comfortable shaves and recurring skin problems that undermine confidence.
“Proper razor maintenance isn’t just about the tool—it’s about respecting the skin it touches and understanding that small acts of care compound into significant long-term benefits.”
— Dermatology Times
Key Takeaways
- Rinse thoroughly after every use to remove hair, skin cells, and shaving cream residue
- Dry your razor completely before storing to prevent rust and bacterial growth
- Store in a dry, ventilated area away from shower spray and humidity
- Sanitize regularly using alcohol or specialized cleaning solutions
- Replace blades at appropriate intervals to maintain hygiene and performance
- Never share razors to prevent cross-contamination and infection
The Hidden Dangers Lurking on Your Razor
Picture this: a single blade, used daily, sitting wet in a steamy bathroom. Within hours, bacteria begin colonizing the moist surface. Pseudomonas aeruginosa, Staphylococcus aureus, and other microorganisms find the perfect breeding ground in the microscopic spaces between blades and cartridges. These aren’t just abstract concerns—they’re the culprits behind folliculitis, razor bumps, and more serious skin infections.
The stakes become even higher when rust enters the equation. Oxidized metal doesn’t just dull the blade’s edge; it creates an abrasive surface that tears at skin rather than gliding smoothly across it. Each stroke with a rusty razor increases the risk of micro-cuts, which serve as entry points for bacteria. The result? A grooming ritual that should be straightforward transforms into a source of discomfort and potential health complications.
Understanding these risks isn’t meant to create fear—it’s meant to empower better choices. With proper care, razors remain safe, effective tools that deliver consistently smooth results without compromising skin health.
The Science Behind Rust and Bacterial Growth
Razor blades face a perfect storm of conditions that promote degradation. The combination of moisture, oxygen, and warmth creates an ideal environment for oxidation and microbial proliferation. When water remains on metal surfaces, it initiates a chemical reaction that gradually converts iron into iron oxide—commonly known as rust. This process accelerates in humid environments like bathrooms, where steam from hot showers maintains elevated moisture levels throughout the day.
Bacteria thrive in similar conditions. The warm, wet environment of a bathroom provides exactly what microorganisms need to multiply rapidly. Add in the organic matter that accumulates on razors—dead skin cells, hair fragments, soap residue—and you’ve created a bacterial buffet. Studies have shown that razors stored in bathrooms can harbor significant bacterial populations within 24 hours of use.
The good news? Both rust and bacterial growth are entirely preventable with consistent care practices. The key lies in disrupting the conditions these problems require, creating an environment where blades stay clean, dry, and ready for optimal performance.
Essential Daily Cleaning Rituals
The Immediate Rinse
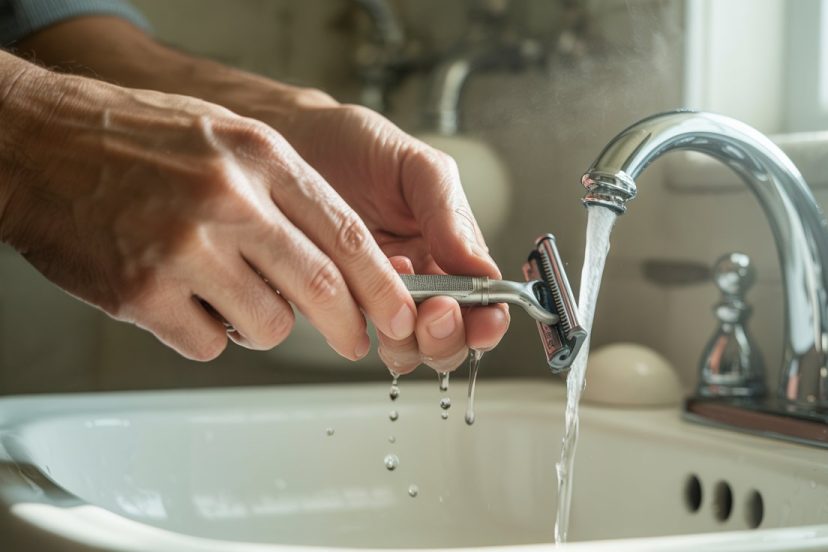
The moment a shave ends marks the most critical window for razor care. Hot water running over the blades serves multiple purposes simultaneously: it dislodges trapped hairs, flushes away shaving cream residue, and removes skin cells before they can dry and harden into stubborn buildup. Hold the razor under a strong stream, angling it to let water flow between the blades from multiple directions.
Many make the mistake of a cursory rinse, assuming that if the razor looks clean, it is clean. But appearance deceives. Microscopic debris remains lodged in places invisible to the naked eye, creating anchoring points for bacteria. A thorough rinse takes at least 15-20 seconds, ensuring water reaches every crevice and cavity in the razor’s design.
For cartridge razors, running water from both front and back proves essential. The space behind the blades often traps the most debris, yet it’s the area most commonly missed during cleaning. Some find that gently tapping the razor against the sink (not too hard—avoid damaging the blade alignment) helps dislodge stubborn particles before the final rinse.
The Drying Process That Changes Everything
Here’s where most razor care routines fall apart. After rinsing, the razor gets placed back in its holder or left on the sink’s edge—still wet, water droplets clinging to every surface. This single oversight undoes all the careful rinsing and creates the exact conditions rust and bacteria need to flourish.
Proper drying requires intention and technique. Start by giving the razor several firm shakes to remove excess water. Follow this by gently patting the razor with a clean towel, taking care not to drag the towel across the blades (this can dull them and damage the towel). Some prefer using dedicated microfiber cloths that absorb moisture more effectively than standard towels.
Air drying completes the process, but location matters immensely. Placing a wet razor in an enclosed medicine cabinet or leaving it in the direct path of shower spray defeats the purpose. Instead, position the razor in an area with good air circulation, blade-side up if possible, allowing gravity and airflow to work together in evaporating remaining moisture.
Advanced Cleaning Techniques for Deep Maintenance
Weekly Deep Cleaning Protocols
Daily rinsing handles surface-level cleaning, but razors need periodic deep cleaning to address buildup that accumulates over time. Setting aside a few minutes once a week for thorough maintenance extends blade life and ensures consistent hygiene.
Begin by disassembling what you can safely disassemble. For razors with removable cartridges, take them apart to access all surfaces. Prepare a cleaning solution—rubbing alcohol works exceptionally well, as does a mixture of warm water with a small amount of dish soap. Submerge the razor components or use a soft brush (an old toothbrush works perfectly) to scrub gently around blades and in crevices where buildup accumulates.
The brush technique proves particularly effective for addressing stubborn residue. Work bristles carefully between blades, using small circular motions to dislodge buildup without damaging blade edges. Pay special attention to the pivot points where cartridges connect to handles, as these areas often harbor hidden grime.
After scrubbing, rinse everything thoroughly with hot water, then proceed with the drying protocol. Some add an extra disinfection step, soaking the clean razor in rubbing alcohol for 5-10 minutes before the final rinse and dry. This kills any remaining bacteria and leaves the razor sanitized and ready for use.
Sanitization Methods That Actually Work
Sanitization goes beyond cleaning—it actively kills microorganisms that cleaning alone might miss. Several methods prove effective, each with specific advantages.
Alcohol immersion stands out as the gold standard for home razor sanitization. Fill a small container with isopropyl alcohol (70% or higher concentration) and submerge the razor head completely. Let it sit for 5-10 minutes, then remove and allow to air dry. The alcohol evaporates quickly, leaving behind a sanitized, dry surface. This method kills most bacteria and viruses while also helping prevent rust.
Hydrogen peroxide soaking offers an alternative for those who prefer it. Use a 3% solution, submerging the razor for about 10 minutes. This oxidizing agent effectively kills bacteria while being gentler on some materials than alcohol. Rinse thoroughly after soaking and dry completely.
Specialized razor cleaning products have entered the market, formulated specifically for blade care. These solutions often combine cleaning and sanitizing properties, sometimes including rust inhibitors and lubricants that help maintain blade sharpness. While more expensive than household alternatives, they offer convenience and comprehensive care in a single product.
UV sanitizers represent the high-tech option. These devices use ultraviolet light to kill bacteria and viruses without chemicals or moisture. Simply place the razor in the sanitizer chamber for the recommended duration (usually 3-5 minutes), and UV radiation does the work. While requiring an initial investment, UV sanitizers offer convenience and thorough disinfection without the need for consumable products.
Storage Solutions That Protect Your Investment
Location, Location, Location
Where a razor lives between uses dramatically impacts its longevity and hygiene. The worst possible location? Inside the shower, constantly exposed to steam, spray, and humidity. Yet this remains one of the most common storage choices, driven by convenience rather than wisdom.
The ideal storage location balances accessibility with environmental conditions. A countertop holder positioned away from the sink’s splash zone and shower spray provides good air circulation while keeping the razor easily accessible. Some prefer wall-mounted storage outside the shower, which keeps razors completely dry between uses.
Medicine cabinets present a mixed option. If well-ventilated and the razor is completely dry before storage, they work adequately. However, enclosed cabinets in humid bathrooms can trap moisture, potentially doing more harm than good. If using cabinet storage, consider adding moisture-absorbing packets (silica gel) to help maintain dry conditions.
Avoid storing razors in drawers or enclosed containers unless absolutely certain they’re bone dry. Trapped moisture in enclosed spaces creates perfect conditions for rust and mildew, essentially turning storage into an incubator for the very problems proper care aims to prevent.
Storage Accessories That Make a Difference
Purpose-designed storage solutions do more than organize—they actively protect razors from damage and contamination. Magnetic strips mounted on walls hold razors securely while ensuring excellent air circulation around all surfaces. This storage method also looks sleek and modern, turning functional storage into an aesthetic element.
Razor stands come in countless designs, but the best share common features: they hold razors blade-side up, allow water to drain away from components, and position blades in open air rather than against surfaces. Look for stands with weighted bases that won’t tip over easily, and materials that resist moisture damage—stainless steel and certain plastics work well, while wood can harbor moisture and bacteria if not properly sealed.
Travel cases deserve special mention because they present unique challenges. The temptation to toss a still-damp razor into a case for convenience can undo weeks of careful home maintenance. Quality travel cases include ventilation features that allow moisture to escape. Some even incorporate built-in sanitization systems. Before any trip, ensure the razor is completely dry, and upon arrival, remove it from the case as soon as possible to air out.
Protective blade covers serve a purpose beyond safety—they can help keep blades clean between uses. However, only use them on completely dry razors. Trapping moisture under a blade cover accelerates rust and bacterial growth, transforming a protective measure into a problem.
Extending Blade Life Through Proper Care
When Maintenance Meets Economics
Razor blades aren’t cheap, and the cost of cartridges adds up quickly. Proper care doesn’t just benefit skin health—it stretches the lifespan of each blade, saving money while maintaining shaving quality. A well-maintained blade can last twice as long as a neglected one, making the few extra minutes spent on care a worthwhile investment.
The signs of blade degradation aren’t always obvious. Many continue using blades well past their prime, not realizing that dullness increases skin irritation and requires multiple passes over the same area—which itself increases irritation risk. A sharp, clean blade glides effortlessly, requiring minimal pressure and leaving skin smooth without redness.
Pay attention to how shaving feels. When smoothness gives way to tugging, when achieving clean results requires extra passes, or when skin feels more irritated than usual despite proper technique—these signals indicate blade replacement time. No amount of cleaning restores a truly dull edge, and continuing to use worn blades defeats the purpose of maintaining hygiene.
The Stropping Technique for Home Use
Professional barbers have long known a secret that home shavers are rediscovering: stropping can realign blade edges and extend usable life. While you can’t truly sharpen disposable cartridge blades, you can improve their performance through careful stropping.
The technique involves running the blade backward (opposite the cutting direction) along denim fabric or leather. This doesn’t sharpen in the traditional sense but rather straightens microscopic irregularities in the blade edge that develop during use. Five to ten strokes before each shave can noticeably improve performance and extend blade life.
Some use old jeans specifically for this purpose, creating a DIY stropping setup that costs nothing. Others invest in leather strops designed for razor maintenance. The key is consistency and proper technique—always stroke backward, never forward, and use light, even pressure throughout the motion.
Addressing Common Mistakes and Misconceptions
The Myths That Sabotage Care Efforts
Myth: Hot water sterilizes adequately
Many believe that rinsing with hot tap water sufficiently sanitizes razors. While hot water does clean better than cold and kills some bacteria, tap water temperature isn’t hot enough for true sterilization. Hot water serves as an excellent cleaning tool but doesn’t replace proper sanitization methods.
Myth: Blades self-clean in the shower
Some leave razors in the shower, reasoning that running water keeps them clean. In reality, this creates the worst possible storage environment. Steam, spray, and constant humidity accelerate rust and promote bacterial growth, while soap residue from other products can coat blades and attract more buildup.
Myth: Blade lubricating strips make sanitization unnecessary
Those colorful strips on modern cartridges serve specific purposes—providing lubrication and indicating wear—but they don’t have antibacterial properties. In fact, they can trap bacteria and debris if not cleaned properly, adding another surface that requires attention.
Myth: Expensive razors don’t rust
While higher-quality razors may use rust-resistant materials, no blade is completely immune to oxidation given sufficient moisture exposure. Price doesn’t eliminate the need for proper care; it simply means the razor might tolerate neglect slightly longer before problems become obvious.
The Mistakes That Undermine Good Intentions
Even those committed to proper razor care often make subtle errors that limit effectiveness. Storing razors in holders that collect water at the base creates a moisture reservoir that constantly re-wets cleaned blades. The solution? Choose holders with drainage holes or elevated designs that prevent water accumulation.
Another common error involves over-handling during cleaning. Excessive scrubbing, especially with abrasive materials, can damage blade coatings and dull edges. Clean thoroughly but gently, letting cleaning solutions do most of the work rather than relying on aggressive mechanical action.
Some take sanitization too far, leaving razors submerged in cleaning solutions for hours or days. This extreme approach can degrade certain materials, particularly plastics and rubber components. Follow recommended soaking times—usually 5-15 minutes—which provide adequate disinfection without causing damage.
The Broader Impact of Better Razor Hygiene
Skin Health Benefits Beyond the Obvious
Improved razor care creates cascading benefits that extend well beyond preventing rust and bacteria. Clean, sharp blades reduce the need for multiple passes, which decreases mechanical irritation to skin. Less irritation means fewer ingrown hairs, reduced inflammation, and improved skin texture over time.
For those prone to acne or sensitive skin, the improvements can be dramatic. Dirty razors introduce bacteria directly into pores and follicles, potentially triggering or worsening breakouts. Clean razors minimize this risk, allowing skin to remain clear and healthy. The confidence that comes with consistently good skin creates positive ripples in other life areas—social interactions feel easier, self-consciousness diminishes, and grooming becomes something to look forward to rather than dread.
The time invested in proper care also fosters mindfulness around personal hygiene more broadly. Those who care for their razors thoughtfully often extend that attention to other aspects of their grooming routine, creating an overall elevation in self-care practices. This mindful approach to grooming can serve as a small but meaningful daily ritual that centers attention and sets a positive tone.
Environmental Considerations
Proper razor care intersects with environmental consciousness in meaningful ways. Extending blade life through good maintenance directly reduces waste, keeping cartridges out of landfills and reducing the environmental impact of manufacturing new blades. While individual impact seems small, collectively, millions of people extending blade life creates significant waste reduction.
This environmental angle doesn’t require sacrificing convenience or results. It simply means being intentional about care practices that serve multiple purposes simultaneously—protecting health, saving money, and reducing environmental footprint. For those seeking ways to make daily routines more sustainable, razor care offers a straightforward opportunity that requires minimal effort and no compromise.
Practical Implementation for Real Life
Creating Sustainable Routines
Knowledge means little without implementation, and implementation requires systems that fit realistically into daily life. The goal isn’t perfection—it’s consistent, adequate care that becomes automatic through habit formation.
Start by placing visual reminders near the shaving area. A small card listing the basic steps—rinse thoroughly, dry completely, store properly—serves as a behavioral prompt until the routine becomes habitual. Over time, these conscious steps transform into unconscious practice, requiring no mental effort to maintain.
Bundle razor care with existing habits. If you already have a skincare routine following shaving, incorporate razor care as the first step in that sequence. The brain loves habits that chain together, and linking new behaviors to established ones dramatically increases consistency.
Keep necessary supplies accessible. If sanitizing requires retrieving alcohol from another room, that friction makes consistent practice less likely. A small bottle of rubbing alcohol stored near the razor, along with a dedicated cleaning brush and cloth, removes barriers to proper care.
Adapting to Different Razor Types
Different razor designs require slightly different approaches, though core principles remain constant. Cartridge razors need attention to the space behind blades, where buildup accumulates most aggressively. Safety razors, with their single exposed blade and simple construction, actually simplify cleaning but require careful handling to avoid cuts during maintenance.
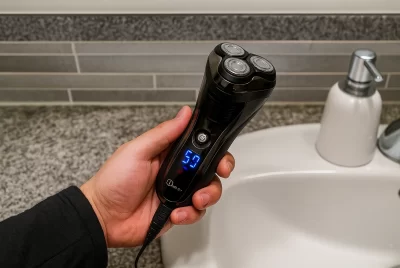
Electric razors present unique challenges, as internal components require periodic cleaning that varies by model. Most modern electric razors include cleaning stations that automate much of the process, though manual intervention still helps extend performance and hygiene. Consult manufacturer guidelines for model-specific care instructions, as approaches vary significantly across brands.
Straight razors demand the most intensive care but also offer the most longevity—a well-maintained straight razor can last decades. Beyond cleaning and drying, they require proper stropping before each use and periodic honing to maintain edge sharpness. The investment in care proves worthwhile for those committed to traditional wet shaving.
Overcoming Obstacles to Consistent Care
Time Constraints and Competing Priorities
The most common excuse for inadequate razor care? “I don’t have time.” Yet the complete process requires perhaps two minutes per shave, with weekly deep cleaning adding another five. Against the backdrop of a busy life, these small time investments might seem hard to justify—until you calculate the cost of skin infections, wasted money on prematurely discarded blades, and decreased confidence from skin problems.
Reframe the time perspective. Those two minutes aren’t lost—they’re invested in preventing future problems that consume far more time and resources. A single visit to address a skin infection, between appointment scheduling, travel, waiting, and treatment, easily consumes hours. Preventive care proves far more efficient than reactive problem-solving.
For the genuinely time-pressed, simplify without abandoning principles. If daily deep cleaning seems impossible, commit to thorough rinsing and proper drying—these alone prevent most problems. Reserve deeper cleaning for weekly sessions when time allows. Some care beats no care, and perfect shouldn’t become the enemy of good enough.
Adapting to Travel and Changing Circumstances
Life doesn’t always cooperate with ideal conditions. Travel, gym showers, and temporary living situations present challenges to maintaining care routines. The solution lies in portable solutions and flexible adaptation rather than abandoning standards.
Travel-sized sanitizing wipes make it possible to clean razors even without access to running water. Small bottles of rubbing alcohol fit easily in luggage and provide sanitization capability anywhere. For those who travel frequently, investing in a quality travel case with ventilation features pays dividends in maintaining razor condition across varied environments.
In shared living situations, personal razor storage becomes even more critical—both for hygiene and for preventing accidental sharing. Clearly marked, individual storage solutions prevent confusion and maintain proper boundaries around personal care items.
Building a Complete Blade Care System
The Minimalist Approach
Not everyone wants elaborate care systems with multiple products and complex routines. For minimalists, a streamlined approach covers essentials without excess: thorough rinsing with hot water after each use, complete drying before storage, weekly sanitization with rubbing alcohol, and proper storage in a dry location. This basic system, consistently applied, delivers most benefits with minimal investment.
The minimalist kit contains just a few items: a bottle of isopropyl alcohol, a small brush for cleaning (a dedicated toothbrush works fine), a clean cloth for drying, and a well-designed razor stand. Total cost? Usually under $15, with most items being one-time purchases that last for years.
The Comprehensive System
For those who embrace thorough care as part of a broader grooming ritual, a more comprehensive system offers enhanced results and the satisfaction of complete attention to detail. This might include multiple cleaning solutions for different purposes, specialized sanitizing equipment like UV chambers, premium drying stations with airflow features, and dedicated storage solutions that complement bathroom aesthetics.
The comprehensive approach isn’t necessary for good results, but it transforms routine maintenance into an enjoyable ritual rather than a chore. For those who find satisfaction in well-executed processes and premium tools, building a complete system becomes part of the broader enjoyment of wet shaving and grooming.
Reflection and Continuous Improvement
What does your current razor care routine look like? When you finish shaving, what happens next? Does the razor get carefully cleaned, dried, and stored, or does it get a quick rinse before being tossed back into a holder? There’s no judgment in the question—only opportunity for reflection and improvement.
Consider where your current practices align with effective care and where gaps exist. Those gaps aren’t failures; they’re simply areas where small changes could yield meaningful benefits. Maybe you already clean thoroughly but store poorly. Perhaps you dry carefully but clean only superficially. Identifying specific improvement areas makes change more manageable and concrete.
Track results. Notice changes in blade performance, skin condition, and blade longevity as you implement better care practices. These observable improvements reinforce new habits and provide motivation to maintain consistency. Over weeks and months, the accumulated benefits make the invested effort obviously worthwhile.
Conclusion
The journey from neglected razor storage to mindful blade care doesn’t require dramatic upheaval or significant resources. It requires only attention, consistency, and a few extra minutes incorporated into existing routines. The payoff—better skin health, extended blade life, cost savings, and the satisfaction of maintaining things properly—far exceeds the modest investment.
Clean razors represent more than just hygiene tools maintained correctly. They symbolize respect for personal health, attention to detail in daily life, and the understanding that small practices accumulate into significant impacts. Every thorough rinse, every careful drying, every proper storage choice contributes to better outcomes over time.
Starting feels like the hardest part, yet it needn’t be complicated. Begin with one change—perhaps committing to complete drying after each use or establishing weekly deep cleaning. As that practice becomes habitual, add another element. Progress through incremental improvement rather than attempting overnight transformation.
Your razor care journey remains uniquely yours, shaped by personal circumstances, priorities, and resources. What matters isn’t achieving some idealized perfection but rather moving consistently toward better practices that serve your needs and goals. The skin you’ll have years from now will reflect the care choices you make today.
Frequently Asked Questions
How often should I replace my razor blade?
Replace cartridge blades every 5-7 shaves for optimal performance and hygiene, though this varies based on hair thickness and maintenance quality. Well-maintained blades may last slightly longer, but avoid using blades beyond 10 shaves regardless of apparent condition. Signs that replacement is overdue include tugging sensations, increased skin irritation, visible rust, or requiring multiple passes for smooth results. Safety razor blades typically need replacement after 5-7 uses, while straight razors can last decades with proper honing and stropping.
Can I use household bleach to sanitize my razor?
Avoid using bleach on razors. While bleach is a powerful disinfectant, it’s highly corrosive to metal and can damage blade coatings, accelerate rust formation, and degrade plastic components. Bleach also poses safety risks if residue remains on the blade. Stick with safer alternatives like rubbing alcohol (70% isopropyl or higher), hydrogen peroxide (3% solution), or specialized razor sanitizing products. These options effectively kill bacteria and viruses without the corrosive properties and safety concerns associated with bleach.
Is it safe to share razors within a family?
Never share razors, even among family members. Razors make direct contact with skin and often cause microscopic cuts invisible to the naked eye. This creates opportunities for blood-borne pathogen transmission, including hepatitis B, hepatitis C, and HIV, as well as bacterial and fungal infections. Each person should have their own dedicated razor, clearly marked or stored separately to prevent accidental sharing. This applies equally to all razor types—cartridge, safety, disposable, and straight razors.
What’s the best way to dry a razor quickly?
The fastest effective drying method involves several steps: First, rinse the razor thoroughly with hot water, then give it several firm shakes to remove excess water. Next, gently pat (don’t wipe) the razor with a clean towel or dedicated microfiber cloth, taking care not to drag fabric across blade edges. Finally, store the razor blade-side up in a well-ventilated area. Some people use a hair dryer on cool setting for 10-15 seconds as a final step, though this isn’t necessary for adequate drying. The entire process takes about 30-60 seconds.
Do electric razors need the same care as manual razors?
Electric razors require different but equally important maintenance. Instead of rust prevention, electric razor care focuses on removing hair and skin cell buildup from cutting elements and preventing bacterial growth. Clean after each use by removing the head and tapping out debris, then use the included brush to clean cutting elements. Weekly, use the manufacturer’s cleaning solution or rinse heads under running water (if waterproof), then sanitize with rubbing alcohol. Let all parts dry completely before reassembly. Many modern electric razors include automatic cleaning stations that handle most maintenance, though periodic manual cleaning still proves beneficial.