Beard Shaping Techniques with a Razor
Post Disclaimer
*We may earn a commission for purchases made using our links. Please see our disclosure to learn more.
Let me tell you something – there’s nothing quite like the clean, sharp lines of a well-shaped beard. After years of trial and error with various tools, I’ve found that a good razor is unmatched for creating those perfect edges that transform an ordinary beard into a statement.
In this guide, I’m sharing my personal techniques for using a razor to shape your beard. Whether you’re maintaining a full beard, cleaning up a goatee, or just defining your neckline, these methods will help you achieve salon-quality results at home.
Key Takeaways
- Proper preparation prevents irritation and ensures cleaner lines
- Your face shape should dictate your beard lines for the most flattering look
- Different razor types offer varying levels of precision and control
- A well-defined cheek line and neckline are the foundations of a shaped beard
- Regular maintenance extends the life of your beard shape between major sessions
Preparation: The Foundation of Good Beard Shaping
I never underestimate the importance of preparation. A rushed job almost always leads to regrets, whether it’s razor burn, uneven lines, or accidental over-trimming.
Start with a clean beard. I wash with warm water and a gentle cleanser to remove dirt and oil. This prevents razor drag and reduces the risk of irritation and ingrown hairs.
Next, soften your beard hair. Either take a warm shower beforehand or apply a hot towel to your face for a few minutes. This softens the hair cuticles, making them easier to cut and reducing that uncomfortable pulling sensation.
Good lighting is crucial but often overlooked. I position myself in front of a well-lit mirror, natural light works best, but a bright bathroom light will do. Poor lighting has led to many “what was I thinking?” moments once I stepped outside.
Finally, gather your tools:
- Your preferred razor
- Shaving cream, oil, or gel
- Aftershave or beard oil
- Trimming scissors for stray hairs
- A clean towel
Choosing the Right Razor
Selecting the right razor is crucial for achieving a well-groomed beard with sharp, clean lines. Different razors offer unique benefits, depending on your skill level, desired style, and personal preference. Here’s a breakdown of the most common types:
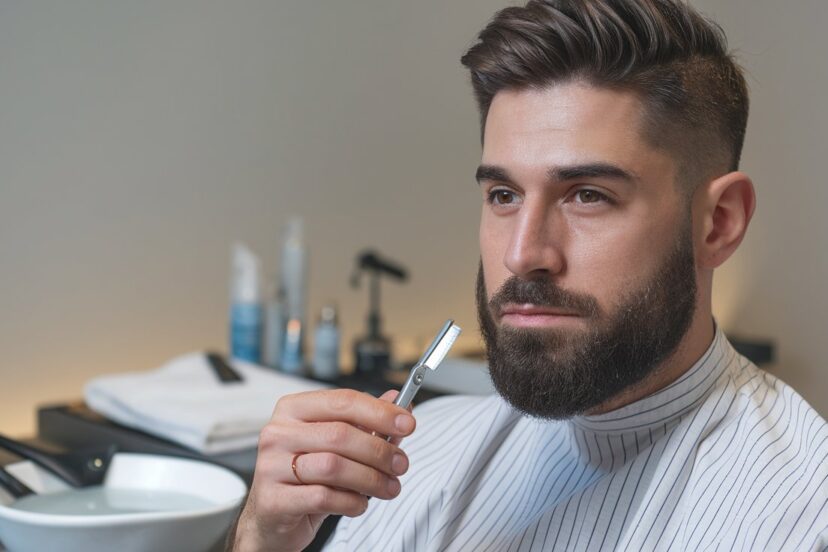
Straight Razors – Precision at Its Peak


Achieve a barbershop-quality shave with the Utopia Care Professional Straight Razor. Crafted from 100% stainless steel, this durable and rust-resistant razor is designed for both professional barbers and home grooming. The ergonomic handle and flip-able blade cover ensure precise control, while the included 100-pack of Derby blades guarantees long-lasting use. Whether you're shaping, trimming, or getting a close shave, this straight razor delivers precision and style at an unbeatable value.
- Durable Build – Made from stainless steel for longevity and rust resistance.
- Ergonomic Grip – Comfortable handle for better control and precision.
- Value Pack – Includes 100 Derby blades for extended use.
- Learning Curve – Requires practice for beginners to master.
- Blade Replacement – Needs frequent blade changes for optimal sharpness.
- No Storage Case – Does not include a carrying or storage case.
Straight razors, often referred to as cut-throat razors, provide unmatched precision and control once you master their technique. They consist of a single, ultra-sharp blade that folds into its handle, allowing for a close, barber-quality shave. I find them excellent for creating crisp cheek and necklines, ensuring sharp, defined edges. However, they require practice, patience, and a steady hand. The learning curve is steep, and improper handling can lead to nicks or irritation. Because of this, straight razors are best suited for experienced users rather than beginners.
Safety Razors – A Balance of Control and Ease


Experience a smooth, irritation-free shave with the Bambaw Double Edge Safety Razor. Designed for both men and women, this high-quality metal razor provides a close, clean shave while reducing ingrown hairs and skin irritation. Its durable stainless-steel construction ensures longevity, and the included 5 double-edge blades offer extended use. Unlike disposable plastic razors, this eco-friendly alternative minimizes waste, making it a sustainable and cost-effective shaving solution.
- Eco-Friendly – Reduces plastic waste with a reusable metal design.
- Durable Build – Made from high-quality stainless steel for long-term use.
- Cost-Effective – Only requires affordable blade replacements.
- Requires Practice – May take time for beginners to adjust.
- No Stand Included – Stand sold separately for storage.
- Blade Handling – Needs careful blade replacement to avoid nicks.
Safety razors are a great middle ground between straight razors and more modern shaving tools. Featuring a single, replaceable double-edged blade, they offer better visibility while shaping your beard, making it easier to maintain symmetry. This precision makes them an excellent choice for detail work, such as refining edges or cleaning up stray hairs. Additionally, they provide a close shave with less irritation than multi-blade cartridge razors, as they reduce the chances of ingrown hairs. I personally prefer safety razors for shaping my beard because they allow for precision without being overly complicated to use.
Cartridge Razors – Convenience and Accessibility


Upgrade your shaving routine with the Amazon Basics 5-Blade MotionSphere Razor. Featuring a multi-axis pivot for effortless contouring, this razor ensures a close, smooth shave. The dual hypoallergenic lubrication strips with Vitamin E help reduce irritation, making it ideal for sensitive skin. With an anti-clog design for easy rinsing and a built-in precision trimmer, it’s perfect for shaping sideburns, goatees, and hard-to-reach areas. This 17-piece set includes a handle and 16 refill cartridges for long-lasting value.
- Smooth Shave – 5-blade design with a flexible pivot for precision.
- Irritation-Reducing – Hypoallergenic lubrication strips with Vitamin E.
- Great Value – Includes 16 cartridges for extended use.
- Handle Compatibility – Cartridges only fit Amazon Basics razor handles.
- Not for Wet Shaving Enthusiasts – Limited to cartridge use, unlike safety razors.
- No Travel Case – Requires separate storage for travel.
Cartridge razors are the most widely available and commonly used option. They are easy to handle, making them ideal for quick, everyday grooming. Their multiple blades and flexible heads provide a close shave with minimal effort, and they are generally more forgiving on the skin. However, the bulkier head design can make it difficult to see exactly where you’re cutting, which affects precision when shaping your beard. This lack of visibility can lead to uneven edges or accidental over-trimming. While cartridge razors are great for general shaving, they may not be the best choice for intricate detailing.
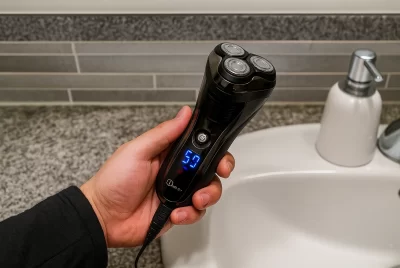
Electric Razors & Trimmers – Speed and Versatility


The Philips Norelco OneBlade 360 is a versatile grooming tool designed to trim, edge, and shave any beard length with ease. Featuring innovative 360 Blade Technology, it flexes in all directions for optimal skin contact, allowing for a smooth and comfortable grooming experience with fewer passes. The fast-moving cutter (12,000x per minute) ensures efficiency, while the dual protection system minimizes irritation. Whether used wet or dry, its lightweight design and USB charging make it the perfect companion for home or travel.
- Adaptive Shaving Technology – The flexible 360 Blade adapts to facial contours for precise grooming.
- Customizable Length Settings – The 5-in-1 adjustable comb allows for customizable stubble length (1-5mm).
- Wet & Dry Use – The water-resistant design enables use in or out of the shower.
- No Power Adapter Included – Comes with a USB charging cable only, requiring a separate adapter.
- Short Battery Life – The battery lasts 45 minutes, which may require frequent recharging.
- Not a Clean Shave – Designed to leave light stubble, not a completely smooth finish.
Electric razors with detailing attachments offer a convenient and efficient way to maintain a beard. They are particularly useful for outlining your beard before refining the edges with a traditional razor. While they don’t provide the same level of closeness as straight or safety razors, they work well for quick touch-ups and defining the overall shape. I often use a trimmer to establish my beard length and outline before switching to a safety razor for fine detailing. Electric razors are also a great option for those with sensitive skin, as they minimize irritation and reduce the risk of razor burn.
Understanding Face Shapes
Your face shape should determine your beard lines. What flatters one face shape can look unbalanced on another.
- Oval Faces can support almost any beard style. If you have an oval face, experiment freely with various shapes.
- Round Faces benefit from beards that add length. I recommend creating angular cheek lines and a slightly longer bottom to visually elongate the face.
- Square Faces look better with softer, rounded beard lines rather than sharp angles, which can make your face appear too boxy.
- Long Faces should have fuller sides and shorter bottom length. Avoid extending the beard too far below the chin.
- Diamond or Triangle Faces typically benefit from fuller beards that add width to the lower face, creating a more balanced appearance.
Defining Your Cheek Line
A well-defined cheek line transforms a scruffy growth into a deliberate style. I start by visualizing where I want my line to fall. For a natural look, I follow where my beard naturally thins toward the cheeks. For a more structured appearance, I aim for a straight line or slight curve from sideburn to mustache corner.
My technique:
- Apply shaving cream above where I want my cheek line.
- With my non-dominant hand, gently pull the skin taut.
- Starting at the sideburn, make small, controlled strokes toward the mouth.
- Periodically check for symmetry by looking straight into the mirror.
Always start higher and work your way down gradually. You can always remove more hair, but you can’t put it back once it’s gone.
For curved cheek lines, I make a small mark at the highest point of the curve (usually aligned with the middle of the ear) and connect it to the sideburn and mustache with smooth strokes.
Creating the Perfect Neckline
The neckline is where most beard-shaping mistakes happen. Too high creates an unflattering “chinstrap” effect; too low can make your neck appear shorter and create a double-chin illusion.
The ideal neckline follows the natural crease where your neck meets your jaw, about 1-2 finger widths above your Adam’s apple. This creates definition while looking natural.
To find this line:
- Tilt your head slightly back and place two fingers horizontally above your Adam’s apple.
- The top finger indicates approximately where your neckline should be.
- Apply shaving cream below this line.
- Start in the center beneath your chin and work outward toward each ear.
- Create a U-shaped curve that follows the jawline rather than a straight line.
- Check your work from different angles, especially from the side.
I typically use my trimmer first to remove the bulk of hair below my intended neckline, then follow with a razor for a closer finish.
Refining the Mustache and Goatee
The mustache area requires special attention due to its prominence and the precision needed around the lips.
For the upper boundary, I let it follow its natural line just below the nose. For the lower edge, I create a clean line just above the lip, being careful not to cut into the mustache itself unless I’m aiming for a specific style.
The soul patch, that small tuft below the lower lip, can add character. I define mine by shaving around it in small, precise strokes, creating a slight taper that widens as it approaches my beard.
For goatees, precision is everything. I outline the desired shape with small razor strokes before clearing the surrounding areas. The outer edges of a traditional goatee typically align vertically with the corners of your mouth, a helpful reference point.
Advanced Shaping Techniques
Once you’ve mastered the basics, try these more distinctive approaches:
- The Faded Cheek Line: Create a gradual fade from clean-shaven to full beard using different guard lengths on your trimmer before finalizing with a razor.
- The Disconnected Beard: Feature a beard that doesn’t connect to the sideburns, with a clean-shaven gap between them. This requires steady hands and excellent lighting.
- Sculpted Edges: Use your razor to create deliberately straight lines or sharp angles. This works well for styles like the boxed beard or the Balbo.
- Tapering Techniques: Combine scissors, trimmers, and your razor to create a beard that gradually increases in length from the cheeks to the chin, adding dimension to your look.
Essential Aftercare
After shaping, proper aftercare ensures healthy skin and longer-lasting lines.
I finish with cold water to close the pores, followed by quality aftershave or beard oil. The aftershave prevents irritation and infection, while beard oil conditions both hair and skin.
For the first 24 hours after shaping, avoid harsh chemicals, excessive sweating, and touching your beard unnecessarily. The freshly shaved areas are particularly vulnerable during this time.
To maintain crisp lines between major shaping sessions, I perform quick touch-ups every 2-3 days, cleaning up any stray hairs that grow outside my established boundaries.
Troubleshooting Common Problems
Even with practice, challenges arise. Here’s how I address common issues:
- Asymmetry: If one side doesn’t match the other, resist the urge to keep cutting. Step back, reassess with fresh eyes, and make minimal adjustments to restore balance.
- Razor Burn: If you’re prone to irritation, use shorter strokes, apply less pressure, and ensure your razor is sharp. Pre-shave oils create a better buffer between blade and skin.
- Ingrown Hairs: Regular exfoliation helps prevent these. I incorporate a gentle scrub into my routine twice weekly to keep pores clear.
- Patchy Growth: Strategic shaping can help camouflage uneven growth patterns. Work with what you have rather than forcing a style that requires fullness in sparse areas.
Conclusion
Shaping your beard with a razor combines technical skill with aesthetic understanding. While it takes practice, the satisfaction of creating your perfect beard shape makes the effort worthwhile.
Remember that your beard is uniquely yours. These techniques provide a foundation, but don’t be afraid to adapt them to your growth pattern, face shape, and personal style. Some of the most distinctive beards break conventional rules.
With patience and practice, you’ll soon create beard lines that enhance your features and express your individual character. The razor is just a tool, your vision and steady hand are what truly create a masterpiece.
Frequently Asked Questions
1. How often should I reshape my beard?
I typically do a complete reshaping every 2-3 weeks, depending on growth rate. Between these sessions, I perform minor touch-ups to maintain the lines. Reshaping too frequently can lead to over-trimming, while waiting too long makes the process more difficult as your beard loses definition.
2. Should I shape my beard before or after trimming its length?
Always trim your beard to the desired length before shaping. This gives you a clearer picture of the final result and prevents accidentally removing too much when defining the lines. I start with a slightly longer guard than my target length, then work down gradually.
3. Is it better to shape when wet or dry?
For coarser beards, shaping while slightly damp makes the hair easier to cut. However, if you have a curly beard, remember that it will appear shorter when dry, so account for this shrinkage. I prefer shaping when my beard is just slightly damp, not soaking wet, but not completely dry either.
4. How do I fix a mistake when I’ve cut too much?
Unfortunately, you’ll have to wait for it to grow back. If you’ve cut your cheek line too low or your neckline too high, either temporarily adjust the rest of your beard to balance the look or consider a shorter overall style until the mistake grows out. This is why I emphasize starting conservatively.
5. What’s the difference between using shaving cream, gel, or oil?
Shaving cream provides good cushioning and visibility against the skin. Transparent gels offer better visibility of the underlying hair pattern but may provide less protection. Oils give excellent glide and are gentle on sensitive skin but can make it harder to see exactly where you’re cutting. I use transparent gel for cheek lines (where I need to see my growth pattern) and white cream for my neckline (where visibility against skin helps maintain a clean line).